


After watching the xppen tutorial video, For drawing head tips i found out about loomis method!
Step-by-Step Construction
Step 1: The Base Sphere & Center Line
Draw a circle to represent the skull. Add a vertical center line to determine the direction the face is turning, and a horizontal line through the middle to establish the brow line. You can also draw a box to guide your head direction.
Step 2: Flatten the Sides
Since the human head is not a perfect sphere, cut off the sides by drawing a vertical ellipse on the side of the ball. The width of this ellipse changes depending on the angle (front, 3/4 view, or profile).
Step 3: Establish Facial Divisions (Rule of Thirds)
Use the vertical height of the side ellipse to divide the face into equal thirds:
Hairline: The top edge of the side ellipse.
Brow Line: The center line of the side ellipse.
Nose Line: The bottom edge of the side ellipse.
Chin Line: Measure one equal unit down from the nose line.
you can play with the ratio to make unique face.
Step 4: Draw the Jaw & Position the Ear
Extend the jawline from the back of the side ellipse down to the chin mark. Place the ear inside the bottom-rear quadrant of the side ellipse, aligned between the brow line and the bottom of the nose.
Step 5: Place the Facial Features
Eyes: Positioned just below the brow line, sitting roughly at the vertical midpoint of the entire head.
Mouth: Positioned about one-third of the way down from the nose line to the chin line.
happy drawing everyone!😊
#XPPenTutorialPractice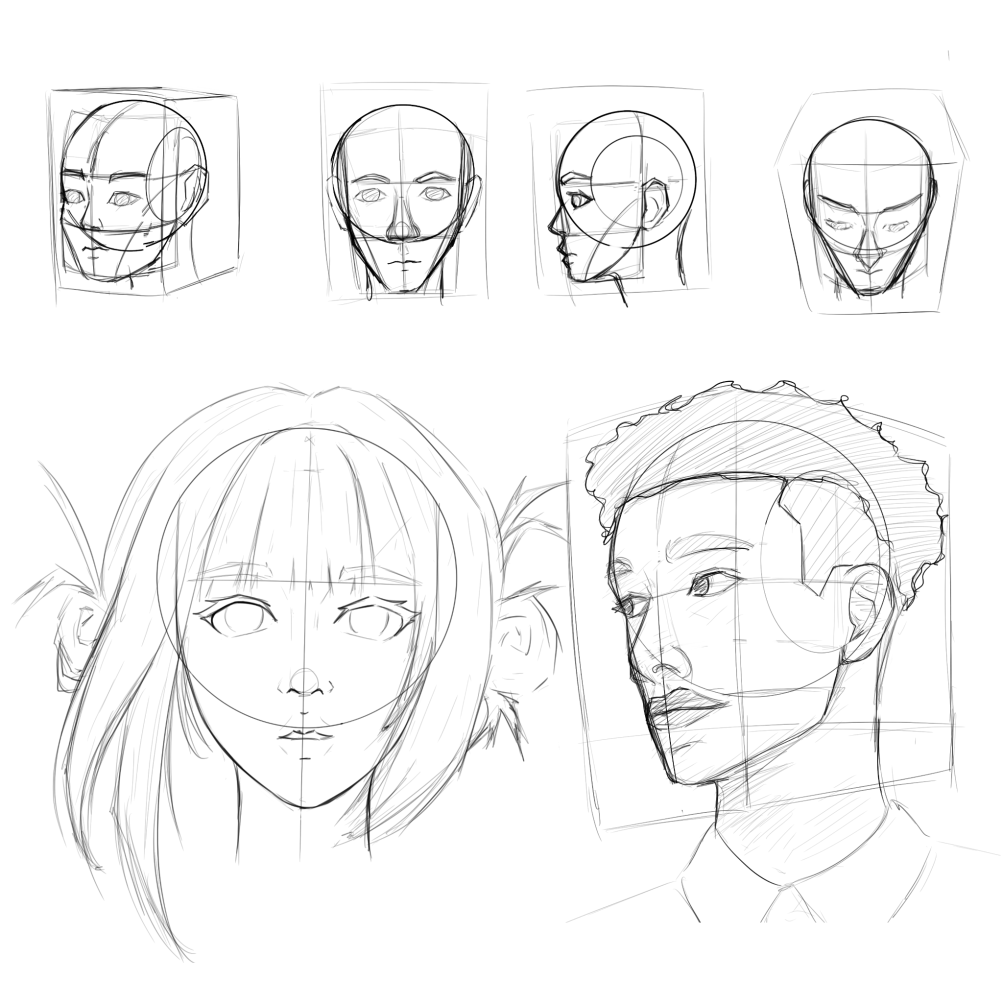

Comments